


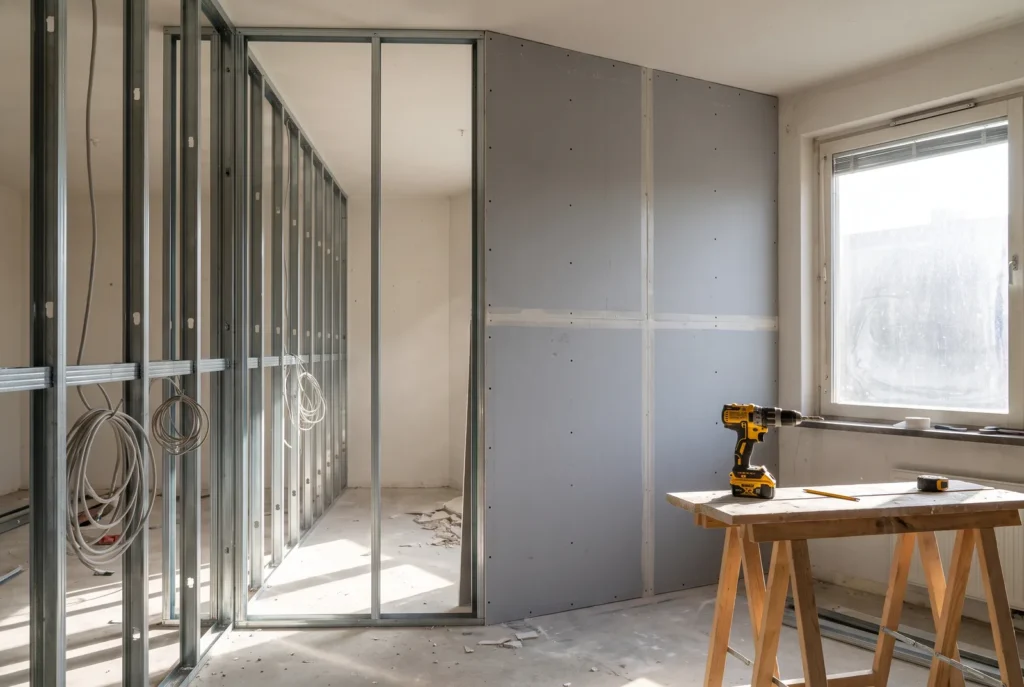
The metal-frame plasterboard partition has become the standard in renovation: light, quick to build, perfectly straight, and far cheaper than a masonry wall. Here is the professional method, with the values of the French standard NF DTU 25.41 (February 2022 edition, in force since 1 May 2022) — the technical document governing plasterboard works.
Sizing according to DTU 25.41
| Parameter | Standard value | Special case |
|---|---|---|
| Stud spacing | 600 mm | 400 mm for tiling, heavy loads or tall walls |
| Board screwing | 25 mm drywall screws every 300 mm | At least 10 mm from the board edge |
| Max height, 48 mm single studs | ≈ 2.60 m | Boxed double studs: ≈ 3.00 m; beyond: 70/90 mm studs |
| Gap at board foot | 10 mm (packers) | Covered later by the skirting board |
| Track fixing | Every 500-600 mm | Resilient tape under the floor track (acoustics) |
The principle (top view)
The materials
- 12.5 mm plasterboard (1.25 × 2.50 m, tapered edges) — wall area × 2 sides + 10 % waste. In wet rooms: moisture-resistant board (green) is mandatory. For enhanced acoustics: high-density acoustic board.
- 48 mm tracks and studs — the finished partition is 72 mm (48 + 2 × 12.5). To run waste pipes: 70 or 90 mm frames.
- 25 mm drywall screws (35 mm for double layers), resilient tape, 45 mm mineral wool.
1. Setting out
Chalk-line the partition on the floor, then transfer the line to the ceiling with a laser level or plumb line. This is the step that decides everything: a partition goes up in a day, a crooked line is paid for over twenty years.
2. The frame
Resilient tape under the floor track, tracks screwed to floor and ceiling every 50-60 cm (anchors suited to the substrate). Studs slotted in every 600 mm (400 mm if the wall will be tiled), stud back facing the first side to be boarded, not screwed to the tracks so they can slide during boarding. Around a door: doubled studs on each side of the frame + a header made from a folded track.
3. The boards
First side: boards vertical, tapered edge against tapered edge, screws every 300 mm at 10 mm from the edge, heads flush without piercing the paper liner. Wool between the studs, electrical conduits run through the stud knockouts, then close the second side offsetting the joints by half a stud spacing — this offset is what stiffens the wall and prevents cracks.
4. Reinforcements: plan them BEFORE closing
- Wall kitchen cabinet, wall-mounted TV, radiator: a timber cross-member or metal plate between studs, at the exact height of the future fixing.
- Wall-hung basin: mounting frame or dedicated reinforcement — a single board carries no more than 30 kg per point even with an expansion anchor.
The 3 beginner mistakes
- Screwing too deep: pierced liner = a screw holding nothing. The head must sit flush.
- Aligning the joints on both sides: guaranteed crack at the first door slam.
- Forgetting the perimeter gap: a board in hard contact with the floor wicks up moisture and cracks the joints.
The joints remain — a craft of their own, covered in our guide to drywall joint tape. Then: the rest of the project in the right order, all the way to laying the wood floor.